Commissioning a Sculpture
To commission a Monumental Sculpture, Work of Fine Art, or Liturgical Sculpture contact the sculpture studio here or click on the contact button on the navigation bar.
The Process
A finished sculpture has gone through many stages from first inception to completed object. Outlined below are stages of a bronze sculpture in chronological order. They can be understood in four distinct phases, Ideation, Sculpting, Mold Making, and Foundry. Different materials such as cast stone, cold cast bronze, marble and wood have different processes that lead to a final artwork.

1. Idea
An idea sparks the imagination of the artist or the patron. Collaboration begins between both the Patron and the Artist that sets the creative wheels turning.

2. Research
After the initial idea has been discussed the team begins to research the subject, idea, or theme of the sculpture. Great care is taken to present the sculpture in a thoughtful light, sensitive to both the viewing public and the commissioning patron.

3. Sketch
Many small clay sketches are created to explore possible forms and compositions. These are quick and meant to be unresolved as they are intended as a communication tool from artist to patron.


4. Maquette
After both the Artist and Patron agree upon a potential clay sketch. The artist creates a larger scale model known as a maquette. The maquette will resolve formal decisions before moving forward onto the full-scale sculpture. This maquette is full of detail and can range in sizes from eight inches to several feet.
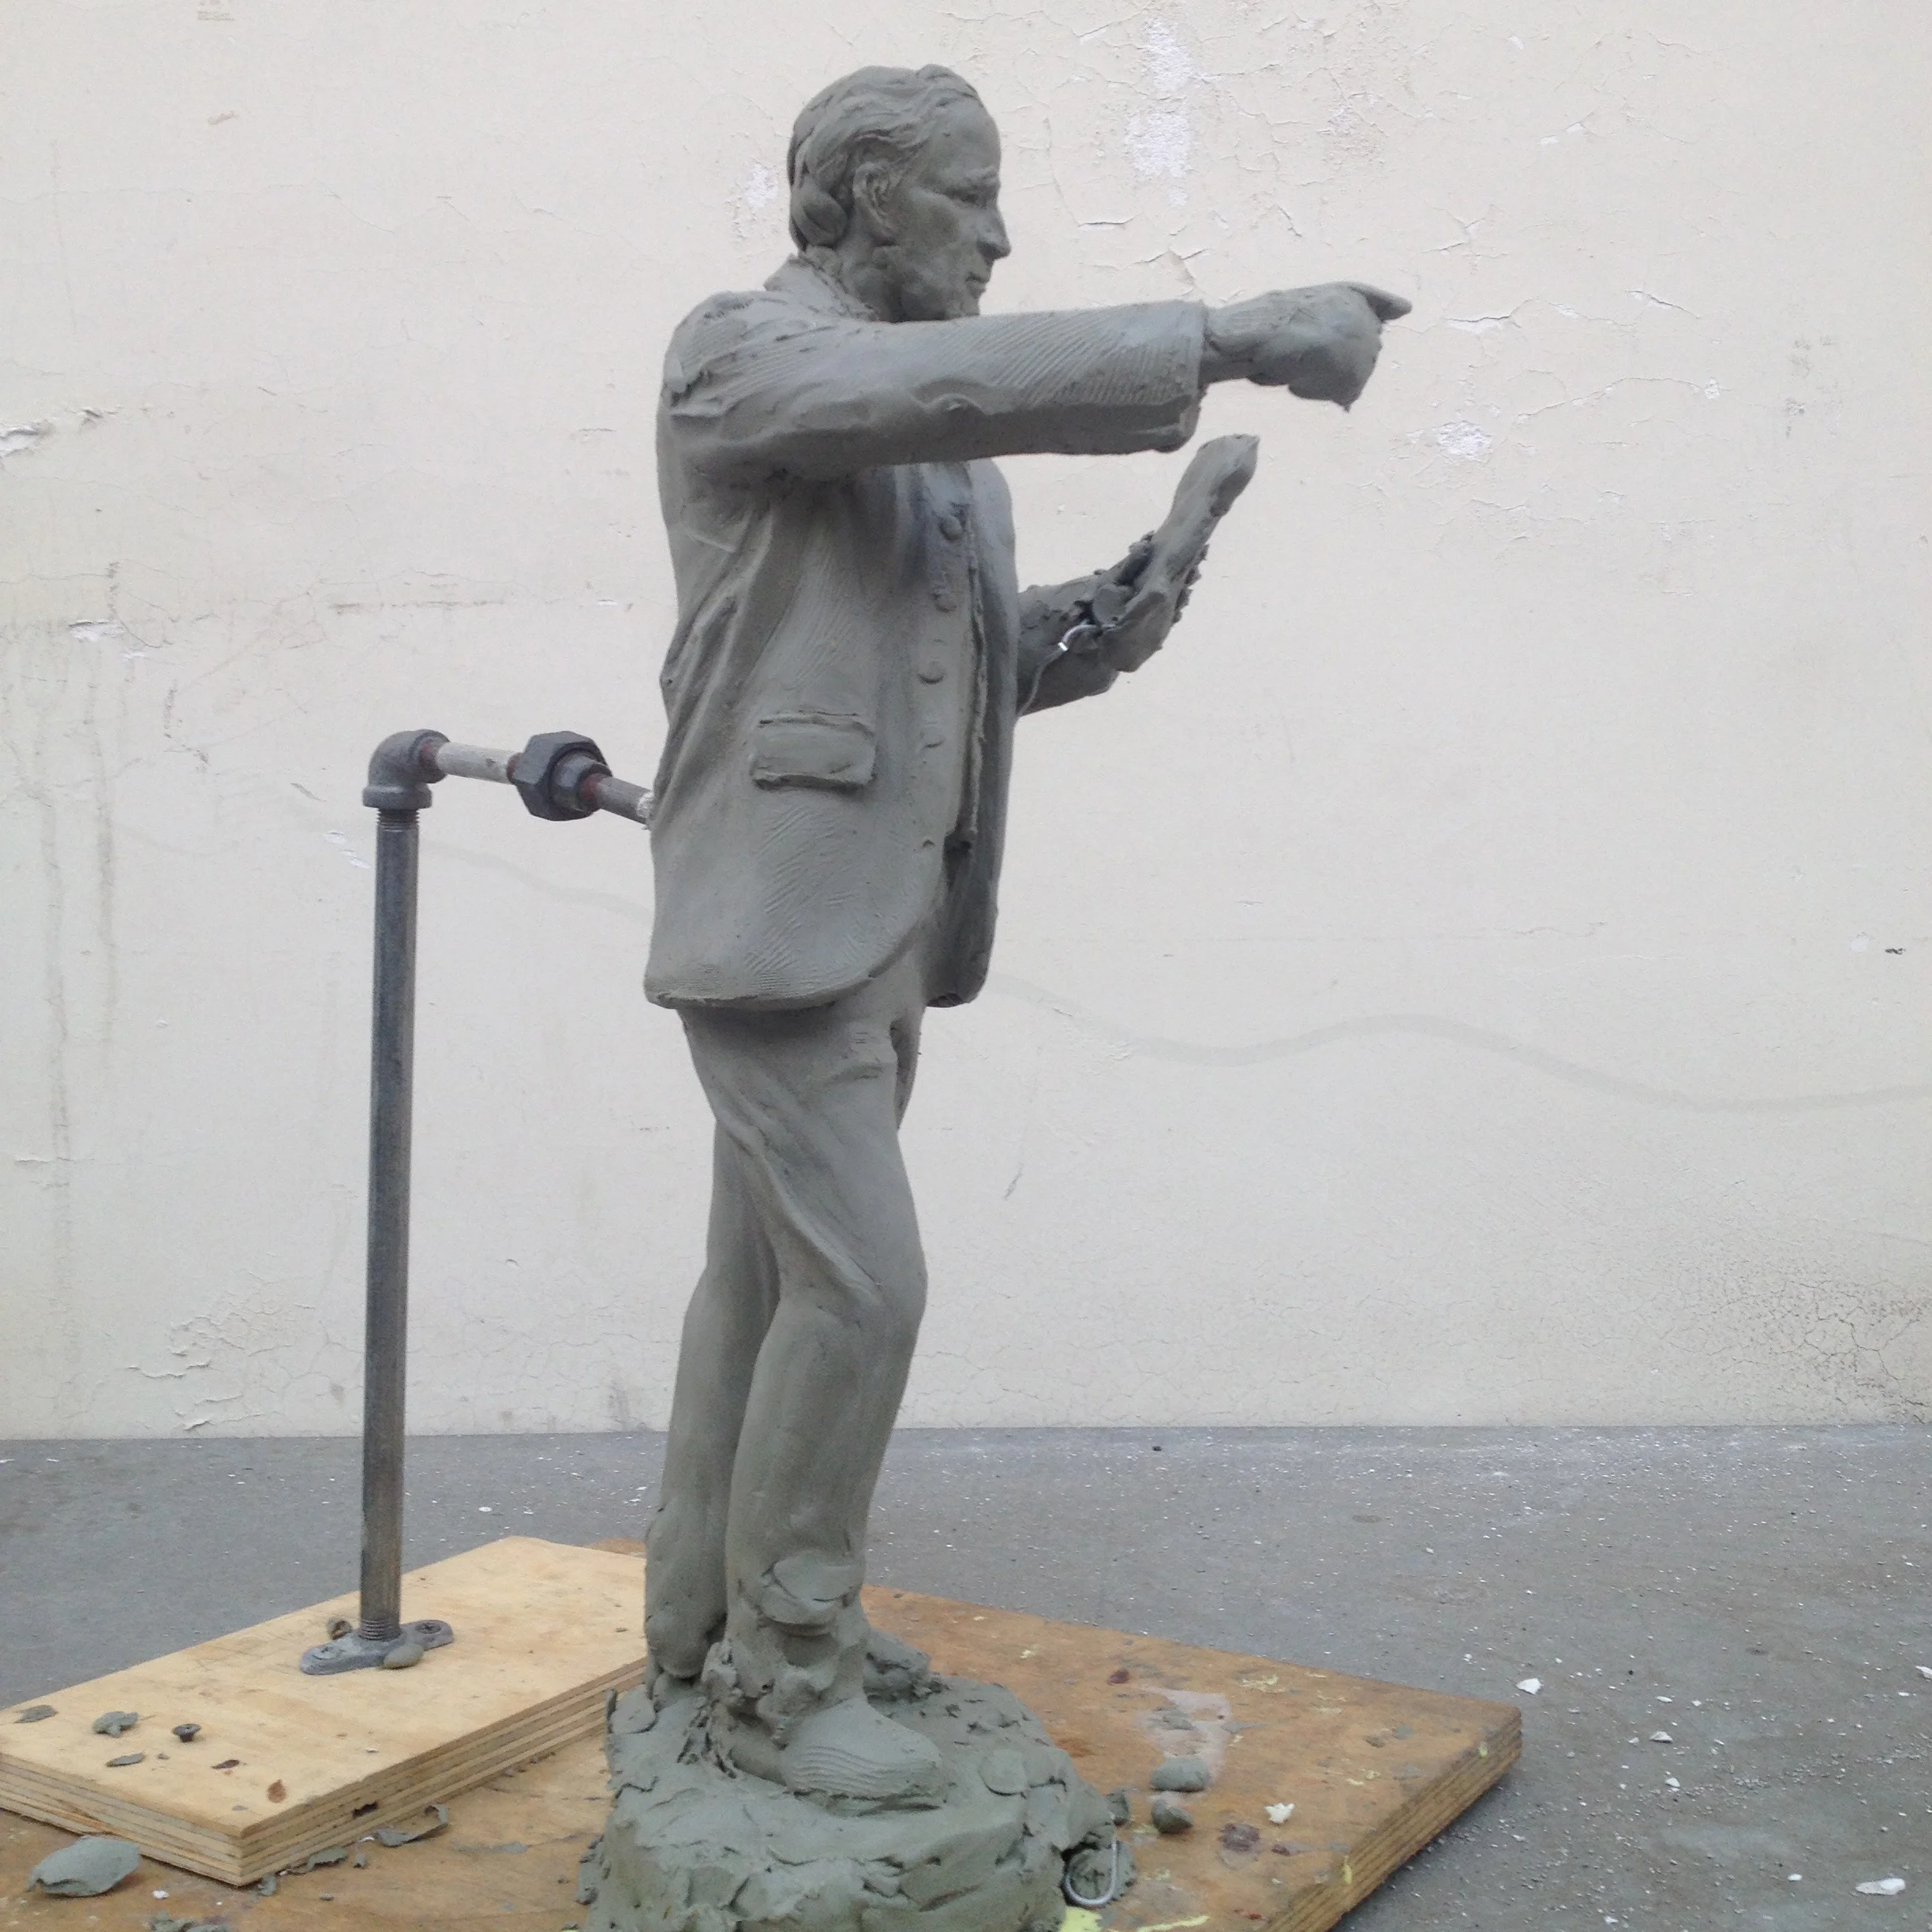
5. Armature
Once the maquette is presented and approved by the Patron, the process of sculpting begins. A heavy rolling platform is constructed of wood and steel. This platform will need to hold up to 800lbs of clay. An aluminum wire understructure is crafted in a simple line drawing fashion and is supported by several cast iron structures. Foam may be applied in areas that are expected to be very thick for both support and reduction of weight.
6. Blocking
Once the understructure has been put in place, clay is applied over it. The artist begins to rough out the shapes of the sculpture using the previously made maquette. A form will begins to appear that acknowledges the preconceived ideas first discussed by both Artist and Patron.


7. Sculpting
This step is what defines an accomplished sculptor from the amateur. Forms flow from one type to another, as complicated transition becomes moments for complex and simple solutions. Prose aside; this is where most sculptures fail. A good sculpture takes time to finesse the details; a great sculpture needs this and an experienced hand.
8. Mold Making
Once the Patron is pleased with the clay sculpture, the machinery of the foundry takes over. Several mold makers devote weeks to carefully creating a three dimensional impression made of layers of painted rubber and plaster. These two components combined create a functional mold.
9. Wax
Once the original clay has been removed from the mold, a void has been left where the original clay once stood. The surface of the interior of the mold is painted with hot, virgin red foundry wax until a desired thickness is created. At this point the wax is carefully cleaned and re-sculpted for improved detail and then split into manageable sections.
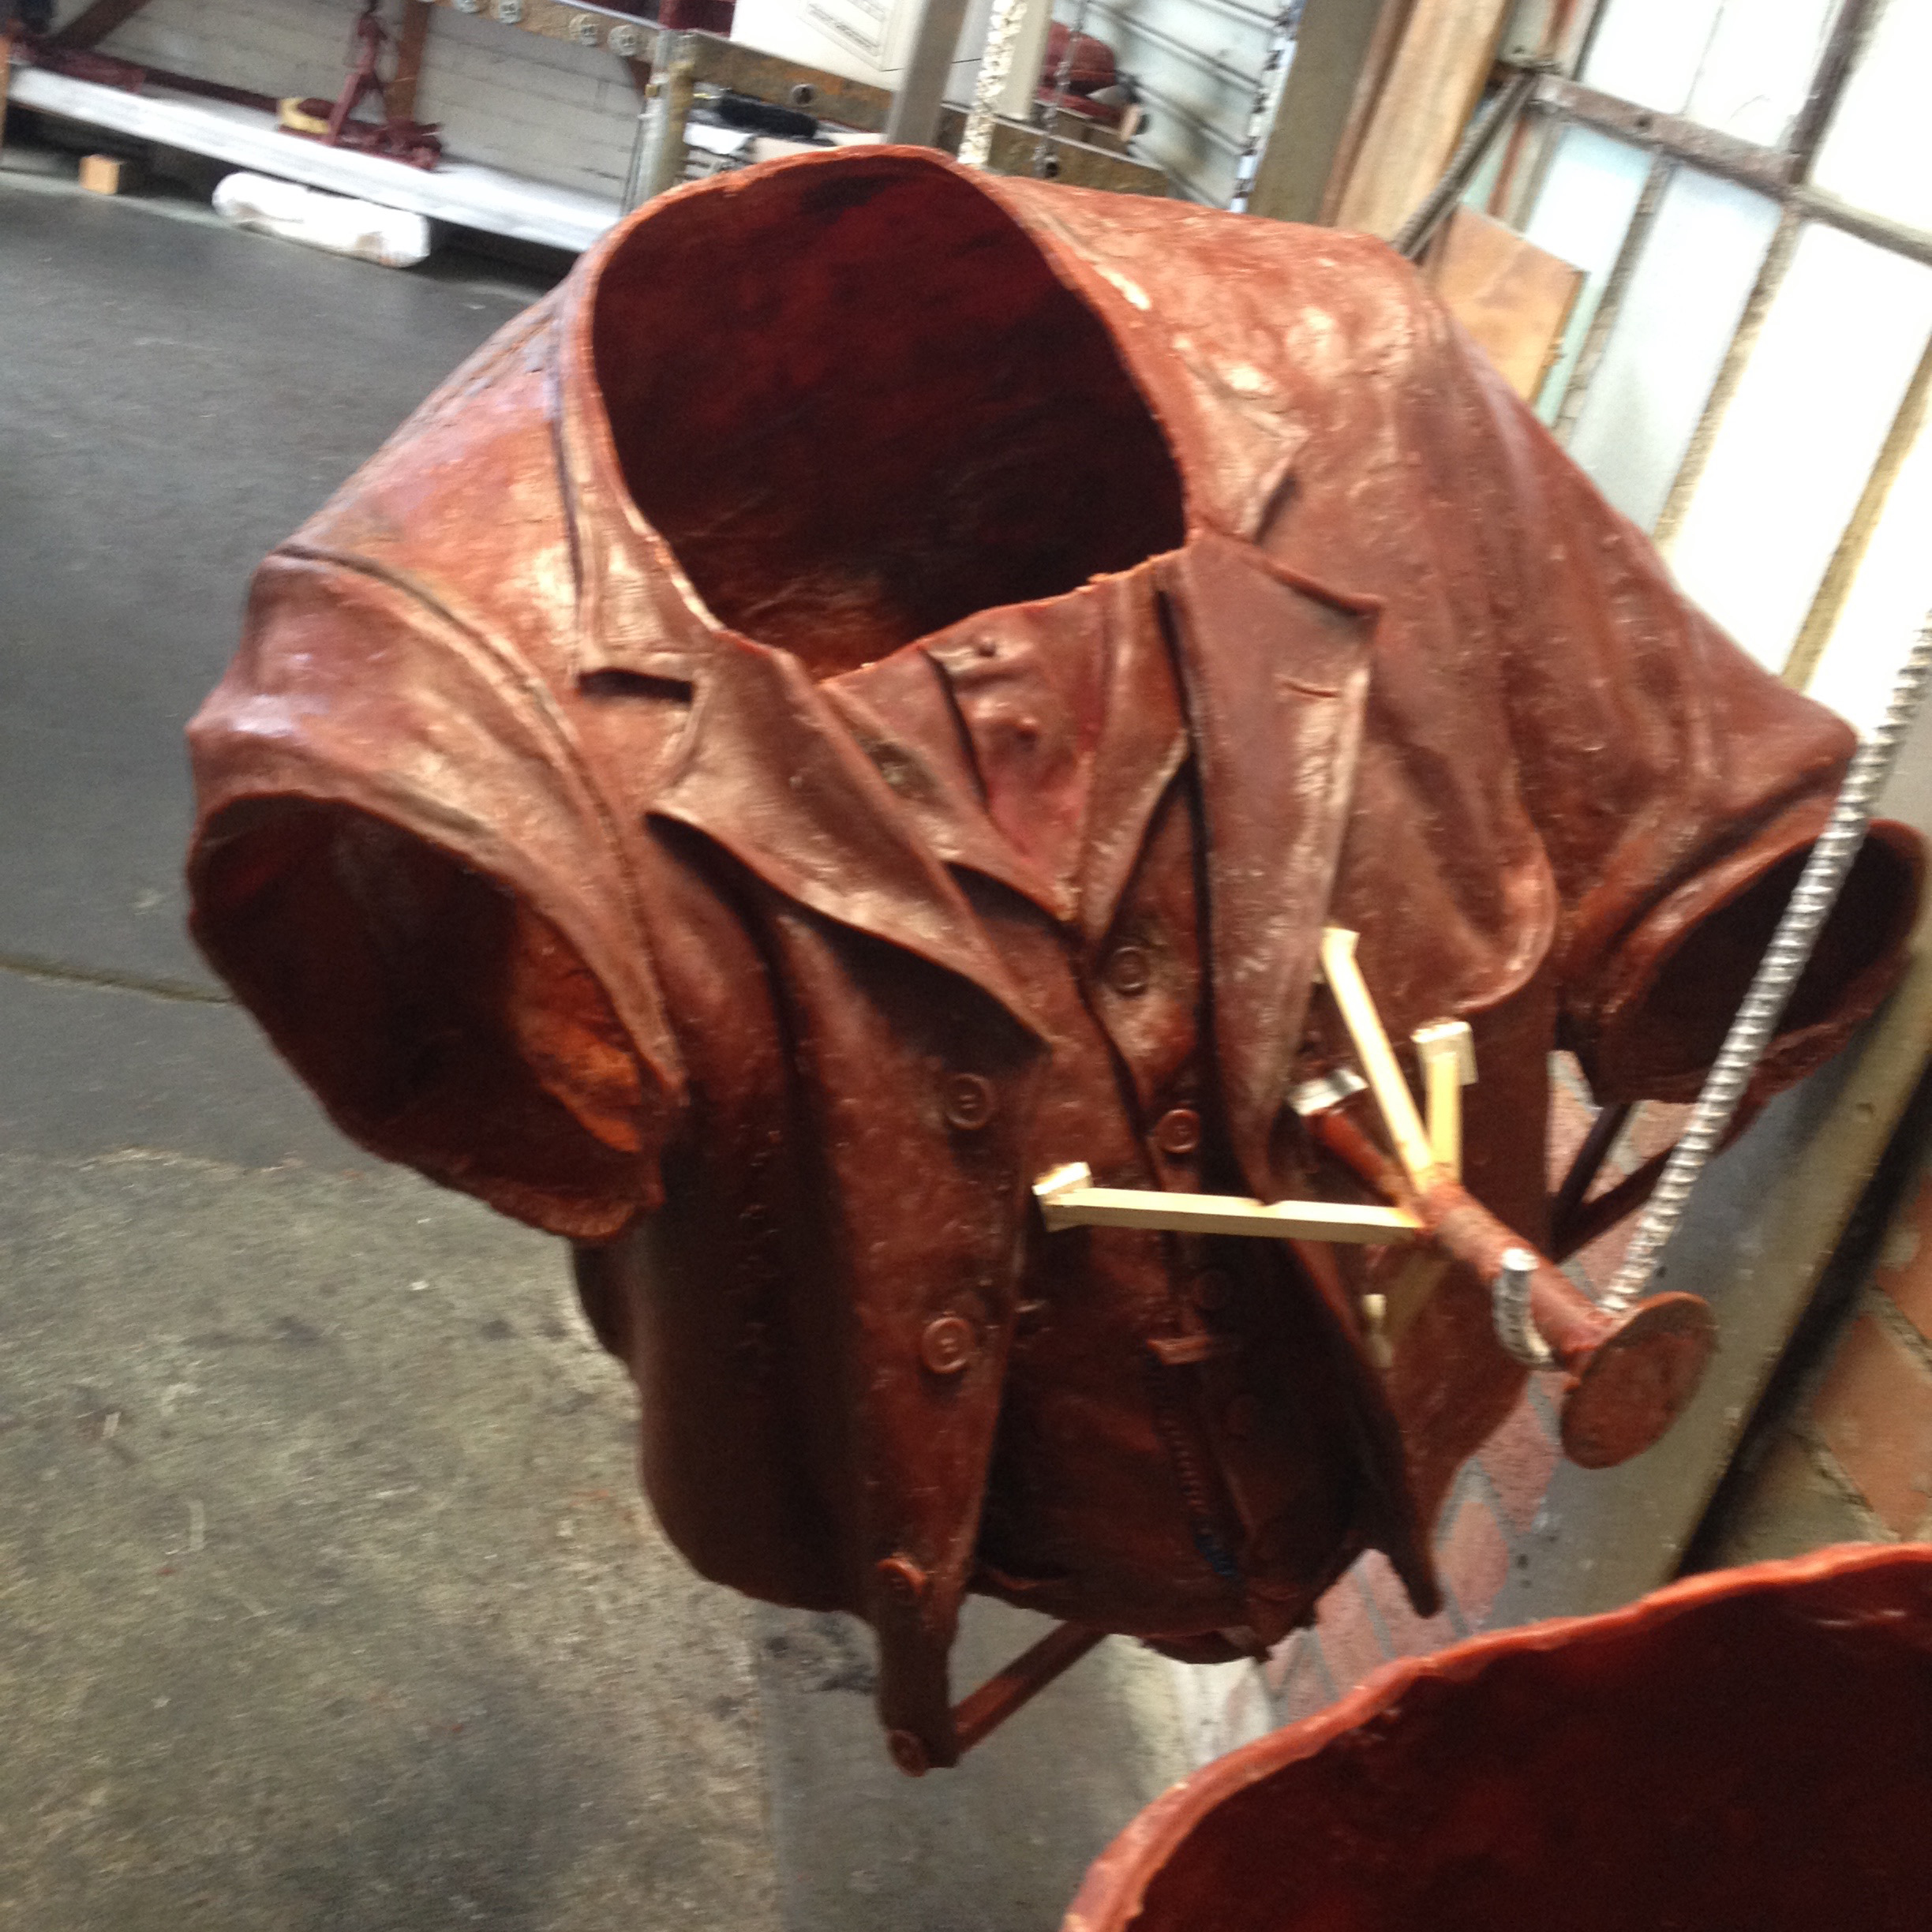


10. Sprueing
Once the wax sculpture has been re-sculpted, chased, and cleaned, wax sprues and gates are applied. These long strips of wax will serve as channels for bronze once the wax is melted from the shell.
11. Shell
Ceramic slurry and different coarseness of sand will cover the wax sculpture and the before mentioned gates and sprues until a thick heavy coating has been built up. This process includes ten to fifteen layers and requires a minimum of an hour drying time between layers.
12. Melt Out
Once the ceramic shell has been created, the red wax is burned out and recycled, leaving a void for bronze to fill.
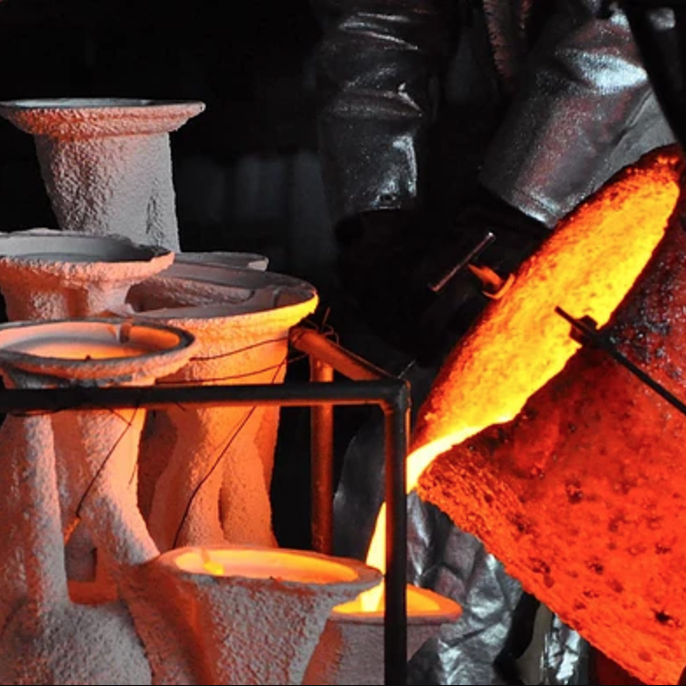
13. Bronze Pour
Bronze is melted at a temperature near 2000 degrees and is poured into the cavity left by the bronze. Specialized equipment, and several professionals are need to guarantee the success of the pour and the safety of the individuals involved.

14. De-Sprueing
Once cooled the shell is removed from the solid bronze using several different tools. After the removal of the bronze from its shell, care will given to detaching the gates and sprues.

15. Welding
Once all of the sections of the sculpture have been freed from their sprues and shells, workman begin to stitch together the pieces in a process similar to assembling a jigsaw puzzle.

16. Patination
After the final sculpture has been stitched together and sandblasted; different acids and bases are used to bring about process that traditionally took several months to achieve. The results are the deep reds, blacks, and greens you see on the surface of many bronze sculptures. A rich layer of hand-applied wax is uses protect this finish.

17. Installation
Depending in the size of the commission, heavy equipment including cranes may be used to set the sculpture into place. This is a dangerous job and takes several skilled workers to complete safely.

18. Maintenance
A yearly wipe down of wax is all you need to maintain your bronze sculpture. As time progresses your patina will mature and react to its environment.